Why does my embroidery design sew the wrong size?
A machine file does not have a size setting you can lose. A DST file, for example, records every stitch as a movement measured in tenths of a millimeter, according to the EduTech wiki format notes, so the design has a fixed physical size built in. If it comes out bigger or smaller than expected, something changed it or the expectation was wrong. Work through the causes in this order:
| What you see | Likely cause | Check |
|---|---|---|
| Much too big or too small, looks fine otherwise | File built at the wrong size, or size worked out from image DPI | Open the file in a viewer and compare width and height with the order |
| Right on screen, wrong on the machine | A resize or scale setting on the machine or in transfer software | Reset any resize on the machine and reload the file |
| Wrong size and now puckers, gaps or breaks thread | Stitch file resized by a large amount | Ask for a file built at the new size |
| Slightly off: longer one way, narrower the other | Push and pull of the stitches | Normal within limits; the digitizer compensates for it |
| Design will not load or is cut off | Larger than the machine's embroidery area | Compare with the embroidery area in your manual |
Our free DST file viewer shows the width and height a file will sew at, straight from its stitches.
Why does resizing a stitch file change the quality?
Wilcom describes machine files as containing only stitch coordinates and machine functions. There are no shapes or stitch settings left in them, only needle positions. Scaling them simply moves those positions closer together or further apart:
- Shrinking packs the same stitches into less space. Density rises, satin columns crowd and small text closes up. Brother warns that reducing an imported pattern can make the stitching tangle and the needle bend or break.
- Enlarging spreads stitches apart. Fills open up and show fabric, and satin stitches get long and loose.
- Compensation and underlay stay fixed in size, so they no longer suit the new shapes.
Brother's PE-DESIGN Lite help recommends keeping imported patterns between about 90% and 120% of their original size. Some machines can recalculate density while resizing: Brother's help for that feature still tells you to sew a trial on the same fabric and threads, and to adjust density if gaps or a thick look appear.
A working file resizes far better. Wilcom notes that the outlines in an EMB file mean it can be scaled and manipulated on an object basis, so the stitches are regenerated for the new size. That is why a big size change should go back to the digitizer rather than the machine. See what an EMB file keeps.
Can the machine or hoop settings change the size?
The hoop itself does not scale a design, but the settings around it can:
- On-screen resize. Many machines let you enlarge or reduce a design before sewing. A resize left over from the last job, or applied to make a design fit the hoop, changes every copy you sew.
- Transfer and editing software. Programs that send designs to the machine can scale them on the way. Check the size shown before you save or send.
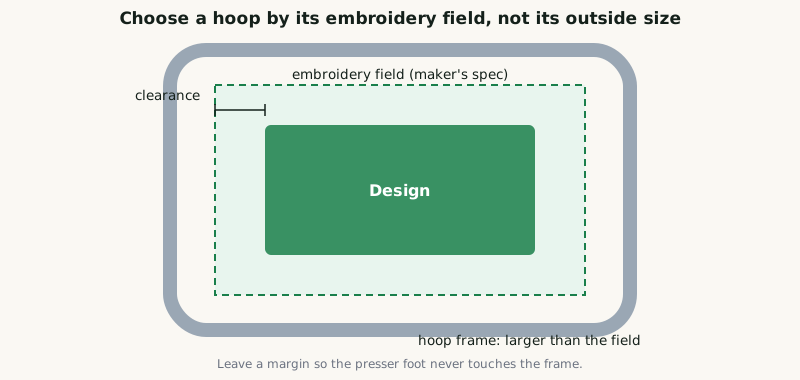
- Embroidery area. The stitching area is smaller than the outside of the hoop. A design larger than your machine's maximum area may not load, and shrinking it to fit brings back the resizing problems above.
- Units. Confirm whether the screen shows inches or millimeters before comparing with the order.
Does image DPI decide the embroidery size?
No. DPI is a note inside an image file that says how large to print it. The same 1,200 pixel wide logo is 4 inches wide at 300 DPI and 12.5 inches at 96 DPI, yet nothing in the picture has changed. Digitizing software may import an image at the size its DPI suggests, and if nobody sets the real finished size, the design gets built at whatever size the image happened to open at.
Two rules avoid it. Always give the finished width or height in inches or millimeters when ordering, never a pixel size. And send the best artwork you have: Hatch Embroidery recommends 300 DPI images rather than 96 DPI screen images for digitizing, because more detail helps, not because DPI sets the size. Our image checker shows whether artwork holds up at your finished size.
Why is the sewn design slightly different from the screen?
Stitches move the fabric. Hatch Embroidery explains that stitches pull the fabric in along the direction of the stitches and push out at a right angle to them, so parts of the design end up further out than what it looks like on your screen. A small difference is normal, and digitizers allow for it with pull compensation.
When the difference is enough to leave gaps between shapes, see embroidery outlines not lining up. When a resized file starts snapping thread, see embroidery thread breaking. The embroidery troubleshooting hub lists the rest.
File not sewing right? Send it to us
We fix or rebuild broken, auto-digitized or third-party files, quoted after a free file check.
Fix my embroidery file →Frequently asked questions
Sources
- Brother Support: precautions for resizing imported embroidery patterns
- Hatch Embroidery: what you need to know about pull compensation (push and pull)
- Wilcom EmbroideryStudio help: machine files
- Wilcom EmbroideryStudio help: Wilcom file formats
- EduTech wiki: embroidery format DST
Sources checked 19 September 2026.